Bulletin Board Do-Over
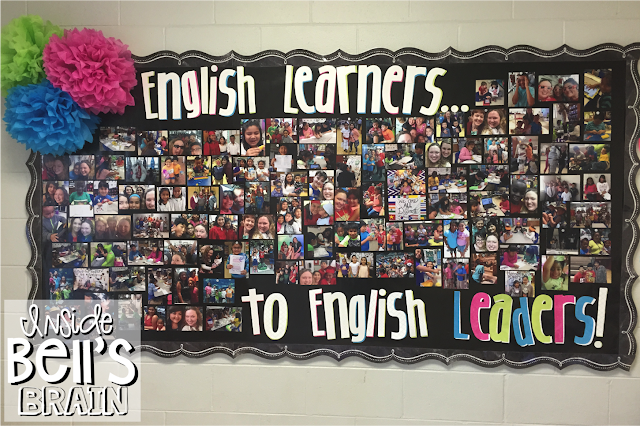
Back to school usually means new bulletin boards, and I'm stoked that I got my new one finished this week. I was really sweating it since I saved it until the end of summer to do! (Yikes!) Here's a look at the finished product!
Let's review...this is what I had. And it was good. It served us well for a long time, and my students loved pointing out their names (and their siblings' names) on the owls' bellies. Of course, I still love owls, but it was time for a change that reflected my style now.

I started with some glossy fadeless black bulletin board paper, a set of tissue poms, and some totes adorbs new scalloped chalkboard border, all of which I scored on a shopping trip to the Parent-Teacher Store earlier this summer for about $20.


I used my Cricut and my Jubilee cartridge, set on "runt" and "real dial size" to cut the 7 1/2" letters. I cut two sets, one in the white pearl finish papers and another set for the shadow effect. I just used some single sheets of lime green, hot pink, and turquoise to complement the color of my poms.

Here's a close-up of the finished product. I love the dimensional-ness of the letters when I used a hodge podge of designs in the white pearl. Of course, that was really because there weren't enough sheets in any one design to cut all the letters, but I think it only adds to the effect.

To focus on the word "leaders", I just swapped the accent colors and the made the pearl finish the shadow color.

Tissue poms: cute, but they are my nemesis. I feel like the only elementary school teacher in the world who lacks the proper skill set to adequately puff these poms. They kept tearing and giving me grief, but I finally managed to puff out something that looked like tissue poms. Then I stapled those bad boys to the board! Obviously, you've probably already seen a pin similar to this, and, yes, I was inspired by this pin of the amazing work that Schoolgirl Style does...click here for the original post on her blog. Mine may not be exactly as cute, but I'm still proud that I came out victorious in the battle of the tissue poms.

To keep going with the dimensional effect, I decided that I would flip my border. Another teacher mentioned putting the border on the metal part of the board, and I had never thought about doing that. So I took that idea and ran with it. I flipped the scalloped edges to "kick it up a notch."

I think the finished effect looks great in the hall. It definitely ties in my door, which I worked on last summer, and carries the colors of my wreath on into the board.

Verdict: tired, accomplished, and ecstatic!


Comments
Post a Comment